Designing Into the Unknown: Building an 8-Foot Inflatable
- Laura K-P

- Jul 22, 2025
- 4 min read
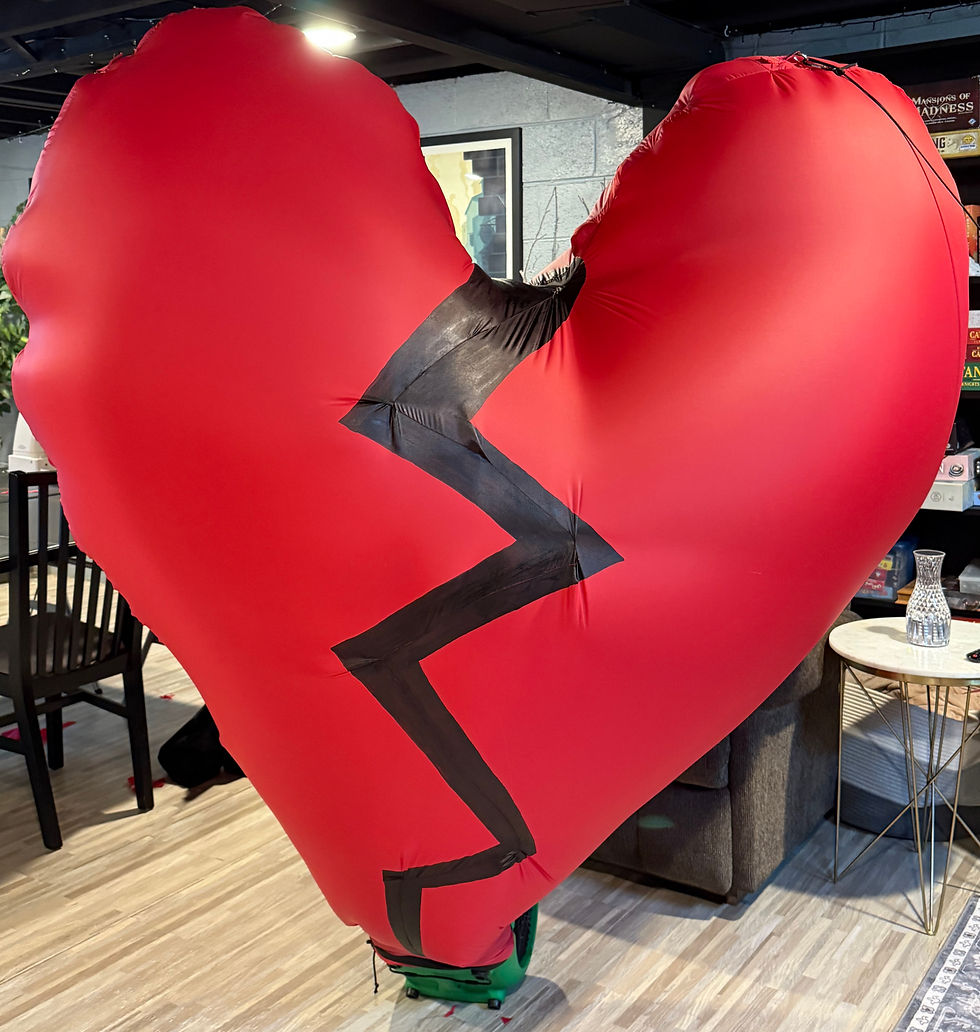
There’s something thrilling and mildly terrifying about saying “yes” to a project I’ve never done before. Recently, I was commissioned by Detroit musician Durracell to create a giant inflatable broken heart to close out a show tied to his upcoming single release.
The goal? Wow the crowd with a dramatic visual prop.
The challenge? I had never made an inflatable before.
But the fun in design, for me, is to step into other people's worlds and learn about materials and methods I had never considered before. What I did have was some experience with fabric-based installation and a good feeling that I could figure it out.
This is a behind-the-scenes look at how I tackled a new medium from scratch.

Step 1: Research + Visual Alignment
Like every project, I started with research. First, the fun part: visual inspiration. I met with Durracell to make sure we were on the same page visually and conceptually. We talked about stage design, iconic set pieces (check out Beyoncé’s Monolith), and how music could inform form. This kind of early alignment is key to making sure everyone’s expectations meet reality down the road.
Step 2: Learning About Inflatables
Inflatables have their own rules. I dove into YouTube tutorials, artist case studies, and maker blogs, gathering info on:
Material: Ripstop nylon is lightweight, durable, and widely used for inflatables.
Construction: Double stitching is key to strength and air retention.
Tools: Use a 110/18 needle and heavy-duty bonded nylon thread for thick synthetics.
Sealing: Precise seams, reinforced tension points, and sometimes seam tape make things airtight.
Fans: Consider airflow power, size, and noise—especially for indoor installations.
This research was less about memorizing and more about understanding the logic behind inflatables—how air moves, how pressure works, and how to keep the whole thing from collapsing.
Step 3: Prototyping with Trash Bags
Before touching the expensive nylon, I prototyped the design using trash bags.

It may seem a strange choice, but trash bags had many benefits for this type of design. They were cheap, flexible, and could be ironed together in an airtight seal.
These prototypes were incredibly helpful. They showed:
Where major air leaks would likely happen
How pressure would pull at the seams
Which order to sew the parts in (a huge help for a less experienced sewer like me)
How complicated forms became a problem for airflow
Originally, my design was pretty elaborate. But through testing, I realized that simplifying the shape helped distribute air more evenly and made the prop more stable.
Step 4: Patterning + Planning

With lessons from my prototypes in hand, I moved on to paper templates. Since the heart needed to be mirrored front to back and measure 8 feet tall, this helped with symmetry and precision. The templates also helped me plan my cuts to minimize fabric waste—a big consideration when working at scale.
Step 5: Production Time
Here’s the order I followed:
Cut out the fabric using the templates
Sew each side of the heart separately
Add a gusset to one side for depth
Stitch both sides together
Add the “sock” that connects to the fan
I used ripstop nylon from FabricWholesaleDirect.com (great quality, plan for at least 2 weeks lead time). The nylon had a one-sided coating, which I placed on the inside for added airflow protection. (If it were for outdoor use, I would’ve considered a double-coated or exterior-coated material.)
For the fan, I chose the XPOWER P-230AT Mini Mighty, a carpet dryer that had the airflow power I needed with a lower noise level. Based on my research, an inflatable of this size needs at least ¼ horsepower to stay fully inflated.
The sock is the material that connects the shape to the fan. Often times this is of a different color to distinguish it from the main shape, however, I only ordered red nylon. The diameter and length of the sock depends on the type of shape you are inflating and air distribution needs. For the heart shape, I created an 8in sock and narrowed my heart shape to meet it at the blower, giving the most direct access to airflow without the need for any internal shaping. I was originally going to attach the inflatable to the fan via velcro, but the fan design didn’t leave enough of a rim. I improvised with a drawstring + bungee cord combo, which ended up creating a very airtight connection.
Step 6: Troubleshooting

Once assembled, I had to solve two key issues:
Shaping the heart
Air is unforgiving—it exposes every minor imperfection. It’ll inflate even tiny gaps, and once you start unpicking seams, you’re left with pinholes. I used GEAR AID seam tape to seal those, though I also tested Seam Grip silicone sealant (which darkened the nylon so always test on a small area first).
Making It Stand
The heart was top-heavy, so it kept flopping over. I solved this by attaching D-rings and guy lines to sandbags, which helped stabilize the piece without adding weight directly to the fabric.
Final Thoughts
This project reminded me why I love saying yes to the unknown. There’s something deeply satisfying about learning a new language—whether it’s materials, movement, or machines—and making it your own.
Want to see the final inflatable in action? Check out Durracell's upcoming shows!

Comments